By Melody Kendall

Having marked out the layout of the walkways and planting areas, we looked at how many hose bibs we wanted and where we should place them. I prefer hose bibs with battery operated timers connected to a drip system as opposed to an electrical timer system. We wanted a shut off valve at the beginning of the line because of my penchant for breaking water lines. My sweet husband dug the trench while I provided the drinking water and a running commentary. A professional laid pvc pipe, installed the shut-off valve and 3 hose bibs. We followed after him filling in the trench. Now we were ready for the next step on our ‘to do' list – moving the roses.


Six of the plants had gopher damage so those were to be the ones we would move. The seventh plant would remain in place as it was situated perfectly in the bed and seemed very happy and gopher free.

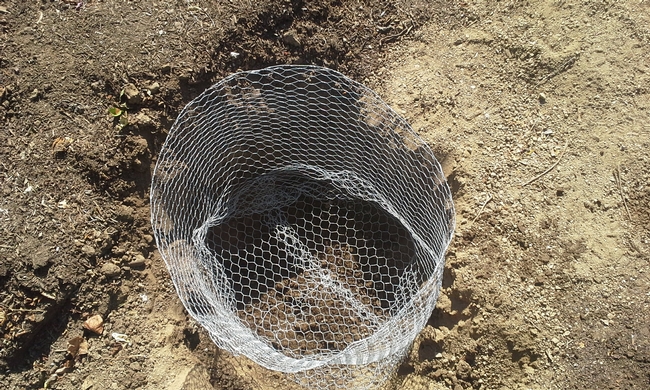
To help in the moving of the roses, I pruned each plant and watered them heavily a week before the scheduled moving day. Also, since gophers had been a problem, I constructed gopher cages from galvanized gopher wire to fit in each hole. The gopher cages are available premade, but we had a roll of the wire so I made my own. Finally, just before removing the roses from the soil, I wrapped each plant with multiple layers of heavy plastic to prevent getting poked by thorns when shifting the plants. I used plastic because I found it doesn't stick to the thorns when removed as much as a cloth drop cloth.
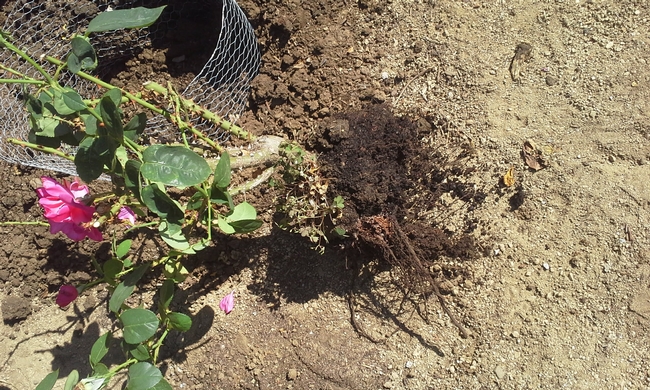
Things didn't go as smoothly as anticipated. The plan was to use a long spade shovel starting about a foot out to circle the plant, inserting the shovel completely to loosen the soil at each thrust of the shovel. The aim was to loosen the rose enough so that a large root ball with a nice chunk of the surrounding soil would come out when the rose was removed. This would disturb the plant as little as possible and would help to mitigate the shock to the plant when transplanting. We are in the summer months and the soil is dry. Even though I had irrigated the plants liberally before beginning the process each plant came away from their resting place with a minimal amount of soil and were almost just bare roots.
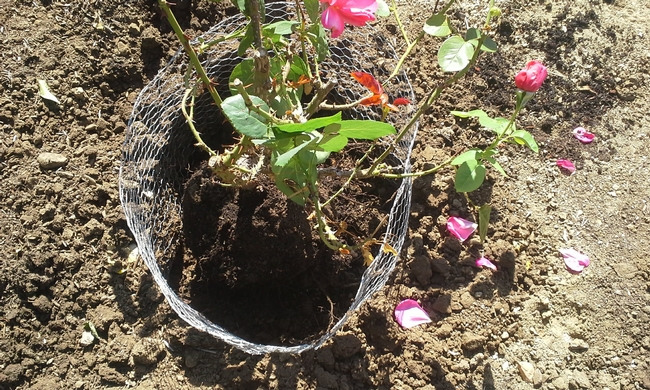
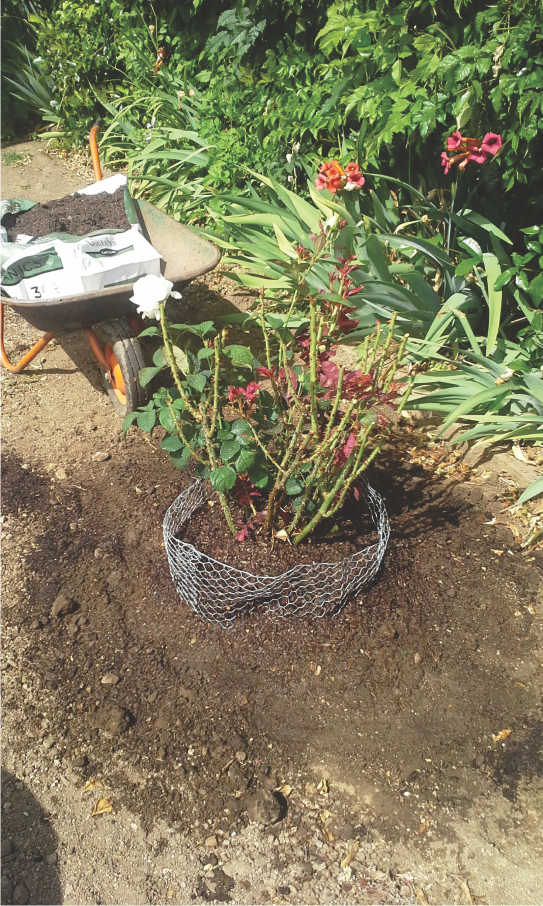
On to plan 'B'. I readied each hole for the rose before removing any more plants from the ground. After inserting the gopher cage in the hole, I mixed the soil from the hole with an equal amount of amended soil and made a small mound of the mixture in the bottom of the hole. I then centered the freshly removed rose plant's roots on the mound and, holding the plant, filled in the soil around the plant. After the hole was filled halfway, I patted down the soil and watered it lightly to remove any air pockets. I then stepped back and made sure that the plant was situated so the point where the plant and root ball joined was about one inch higher than the surrounding soil. To finish I filled in the remaining soil and watered the plant thoroughly.
A freshly transplanted rose will need extra TLC to thrive. It is common, and with our plants especially because of the time of year and the root ball problems, for freshly transplanted roses to exhibit wilting and leaf loss. Extra watering is a big must. We will give the plants lots of water throughout the rest of the year and remove any dry leaves and dead head the plants frequently.
A brief followup: – It has been two weeks and our roses are thriving. If you didn't know they had been transplanted you would not even suspect something that stressful had happened.
Check in to this blog for updates as we continue the Kendall garden redo 2020. Happy gardening.
Information links:
UC Master Gardeners of Napa County
Step by Step Garden Design: http://napamg.ucanr.edu/GardenDesign/
Northern California/Nevada/Hawaii District of the American Rose Society http://www.ncnhdistrict.org/aom/myths.html
UC Integrated Pest Mgmt http://ipm.ucanr.edu/PMG/GARDEN/PLANTS/rose.html
UC Master Gardeners of Napa County http://napamg.ucanr.edu/fuller_park_rose_garden/
UCANR
Using CCA Preservative–Treated Lumber in Gardens and Landscaping https://anrcatalog.ucanr.edu/pdf/8128.pdf
Master Gardeners are following recommended social distancing guidelines that keep everyone safe, Napa Master Gardeners are available to answer garden questions by email: mastergardeners@countyofnapa.org. or phone at 707-253-4143. Volunteers will get back to you after they research answers to your questions.
Visit our website: napamg.ucanr.edu to find answers to all of your horticultural questions.
Photo credits: All photos by Mel Kendall
