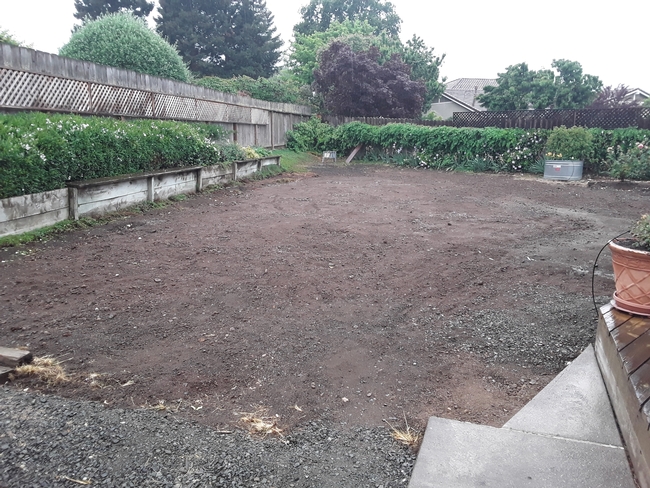
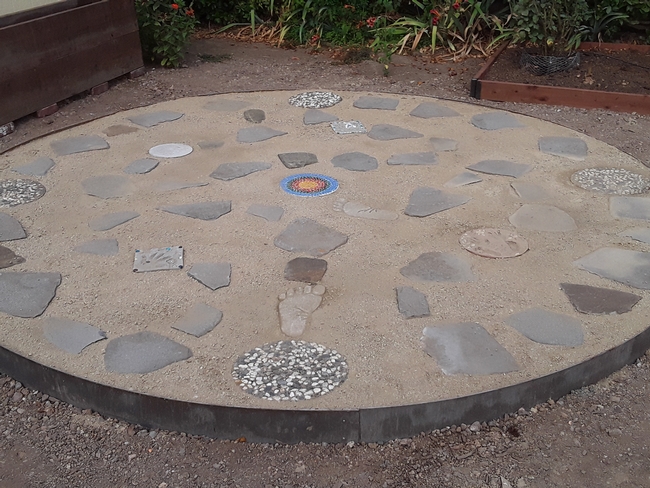
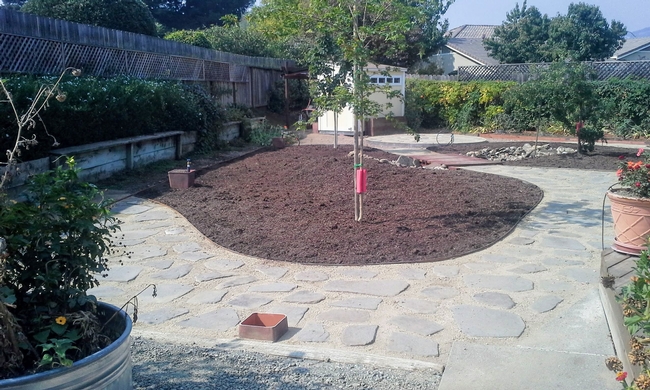
Years ago, we purchased manufactured stones to go around the pool deck. Prior to the pool removal we pried up and stacked these stones to the side. We now got them out, dusted them off and placed them on the prepared gravel/sand surface of the formal walkways and labyrinth. After lots of bending, sweating profusely and much reshuffling we accomplished a layout that was pleasing to all.
Ordering the decomposed granite or DG was somewhat problematic as the lovely curving configuration of the walkways and the labyrinth, while pleasing to the eye, was not computation friendly. We decided to order exactly half of the amount we ordered of the underlayment gravel/sand, since the stones, we thought, took up at least half of the volume themselves. After distribution we ended up with a cubic yard of material left over. We decided to use the surplus material to create some DG paths in the non-formal walkways of the design. This worked out great. We plan to fill the remainder of the non-formal walkways with wood chips 4 inches deep.
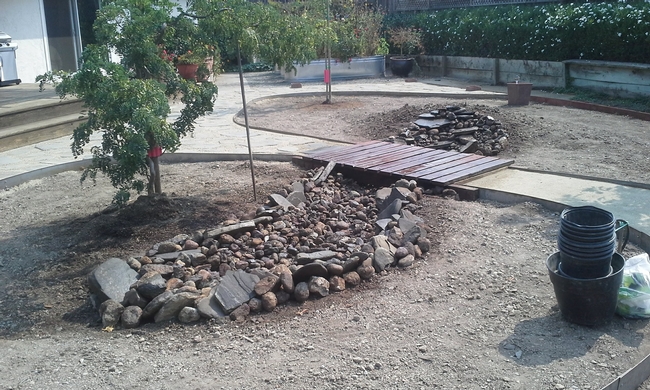
When our pool was removed and the hole filled in, we weren't picky about the quality of the fill dirt. We were just happy that it didn't cost anything and that it was compacted. From day one of the yard redo we have been removing rocks from this fill dirt. Every time we dug any depth in any area of the new landscape we came up with rocks of all different sizes. As we are all about reuse and recycling, we got out all of our empty five-gallon buckets (15 to be exact) and started filling them with these rocks. When a friend came by to check on our redo progress, we showed him the rocks and proudly announced that we had them all divided by size. He smiled and said 'Of course you do'.
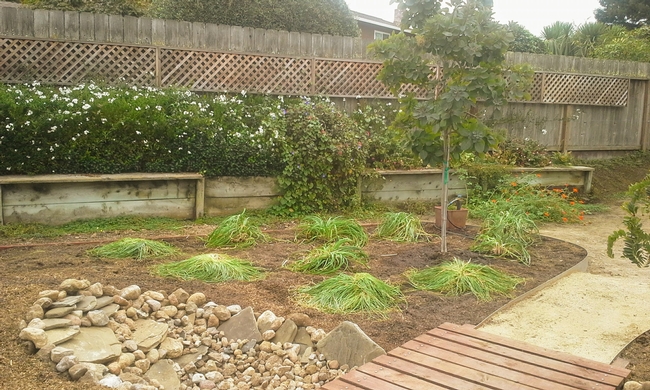
Next on our list was to build a flat wooden bridge over the swale and a potting shed structure. With all that is going on in the world right now getting the treated lumber to build these was not as easy as anticipated. When we finally got the lumber delivered, we were able to create two sturdy structures in just a few days.
On to the planting beds and amending the abysmal soil used for filling in the pool. We used a heavy tined garden rake and hoe to turn over that dead soil down about 8 inches, fluffing and removing rocks (yes, more rocks). Then we added about 2 inches of compost and worked that into the turned soil. As this resulted in little more than putting lipstick on a pig, we brought in 5 cubic yards of enriched topsoil that gave us a 4-inch deep layer when spread over the entire surface. Hopefully this will, over time, make a difference in the soil quality.
From our existing landscape we will use the following:
- Kniphofia, two dwarf varieties one yellow and one green, Kniphofia ‘Christmas Cheer'; Bulbine frutescens - Cape balsam, one yellow and one orange; variegated agapanthus; dwarf agapanthus and multiple daylilies. We are also planning on moving our little Japanese Maple, Acer palmatum dissectum, from its large pot to the top of the faux waterfall.
- We will purchase: Gaillardia, more dwarf Agapanthus, trailing lantana, Lacy Blue Russian Sage and four different colors of daylilies.
Once these are planted, we are set until next spring when we will put in the drip system and pergola. I have my eye on some annuals I'd like to try too.
For us the shelter in place situation had a somewhat silver lining. We had lots of time to do an admittedly ambitious project with no worry of ever realizing the dreaded ‘Covid19' weight gain. But, because of the lumber acquisition issues caused by that same situation, we are putting off building the pergola until next spring. A fellow MG once said that a garden really is never completed and that is how we will look at that aspect. It is such a wonderful gift to look out our windows at a totally new landscape that we conceived and installed together. Couple that with the much reduced electric and water bills, and we consider it a job well worth all of our effort. Within an hour of planting the gaillardia and Lacy Blue Russian Sage, we had bees visiting
Here are some ‘aha' moments we had along the way:
- Loose fabric gloves work for gardening, but use tighter form fitting gloves for any manual labor or you are asking for blisters.
- Wash your fabric gloves often or your hands will smell like stinky feet.
- Turns out the information that touching any part of the gaillardia aka Blanket Flower plant makes your skin itch is true.
- Wear a tool belt of some kind while working to keep track of your tools…somewhere buried in our new landscape is a screwdriver and a case cutter.
- In our barren pre-redo landscape zinnias, sunflowers and morning glory grew and thrived with virtually no water and gave us wonderful color throughout our adventure.
- Best laid plans…sometimes what you imagine isn't up to reality…find a work around.
- When getting a delivery of compost alert the neighborhood…that stuff is STINKY.
Information links: ________________________________________________________________________
UC Master Gardeners of Napa County Step by Step Garden Design http://napamg.ucanr.edu/GardenDesign/
Univ of Maryland extension Permeable hardscapes https://extension.umd.edu/sites/extension.umd.edu/files/_docs/publications/FS-1062%20Permeable%20Hardscapes%20%281%29.pdf
Dry swale info-Santa Cruz Resource Conservation District Tips for Installing a Rock-Lined Swale
Othonna Capensis (Little Pickles, Ruby Necklace) https://www.succulentsandsunshine.com/types-of-succulents/othonna-capensis-little-pickles/
UCANR- Healthy Soils for a Healthy California https://ucanr.edu/sites/soils/
Kniphofia 'Banana Popsicle' https://www.monrovia.com/plant-catalog/plants/7002/banana-popsicle-dwarf-poker/
Kniphofia ‘Christmas Cheer' https://www.monrovia.com/plant-catalog/plants/1724/flamenco-red-hot-poker/
Bulbine frutescens - Cape balsam https://www.monrovia.com/plant-catalog/plants/2918/orange-stalked-bulbine/
Variegated agapanthus https://www.monrovia.com/plant-catalog/plants/3784/gold-strike-agapanthus/
Dwarf agapanthus https://www.monrovia.com/plant-catalog/plants/62/dwarf-agapanthus/
Daylilies https://daylilies.org/
Japanese Maple-Acer Palmatum dissectum https://www.monrovia.com/plant-catalog/plants/3782/tamukeyama-japanese-maple/
Gaillardia https://www.monrovia.com/plant-catalog/plants/1198/arizona-sun-blanket-flower/
Trailing lantana https://www.monrovia.com/plant-catalog/plants/1771/trailing-lantana/
Lacy Blue Russian Sage https://www.monrovia.com/plant-catalog/plants/3663/lacey-blue-russian
Master Gardeners are following recommended social distancing guidelines that keep everyone safe, Napa Master Gardeners are available to answer garden questions by email: mastergardeners@countyofnapa.org. or phone at 707-253-4143. Volunteers will get back to you after they research answers to your questions.
Visit our website: napamg.ucanr.edu to find answers to all of your horticultural questions.
Photo credits: Mel Kendall
